Chat Widget for Website Installation on Any Platform: WordPress, Shopify, Wix, Plain HTML and More
Chat widget for website installs usually take five minutes, but only if you know exactly where your platform wants the code. This guide covers nine common platforms step by step, then lists the problems that stop the bubble appearing and how to fix each one, so you can go from signup to your first test message in one sitting.
⚡ In short
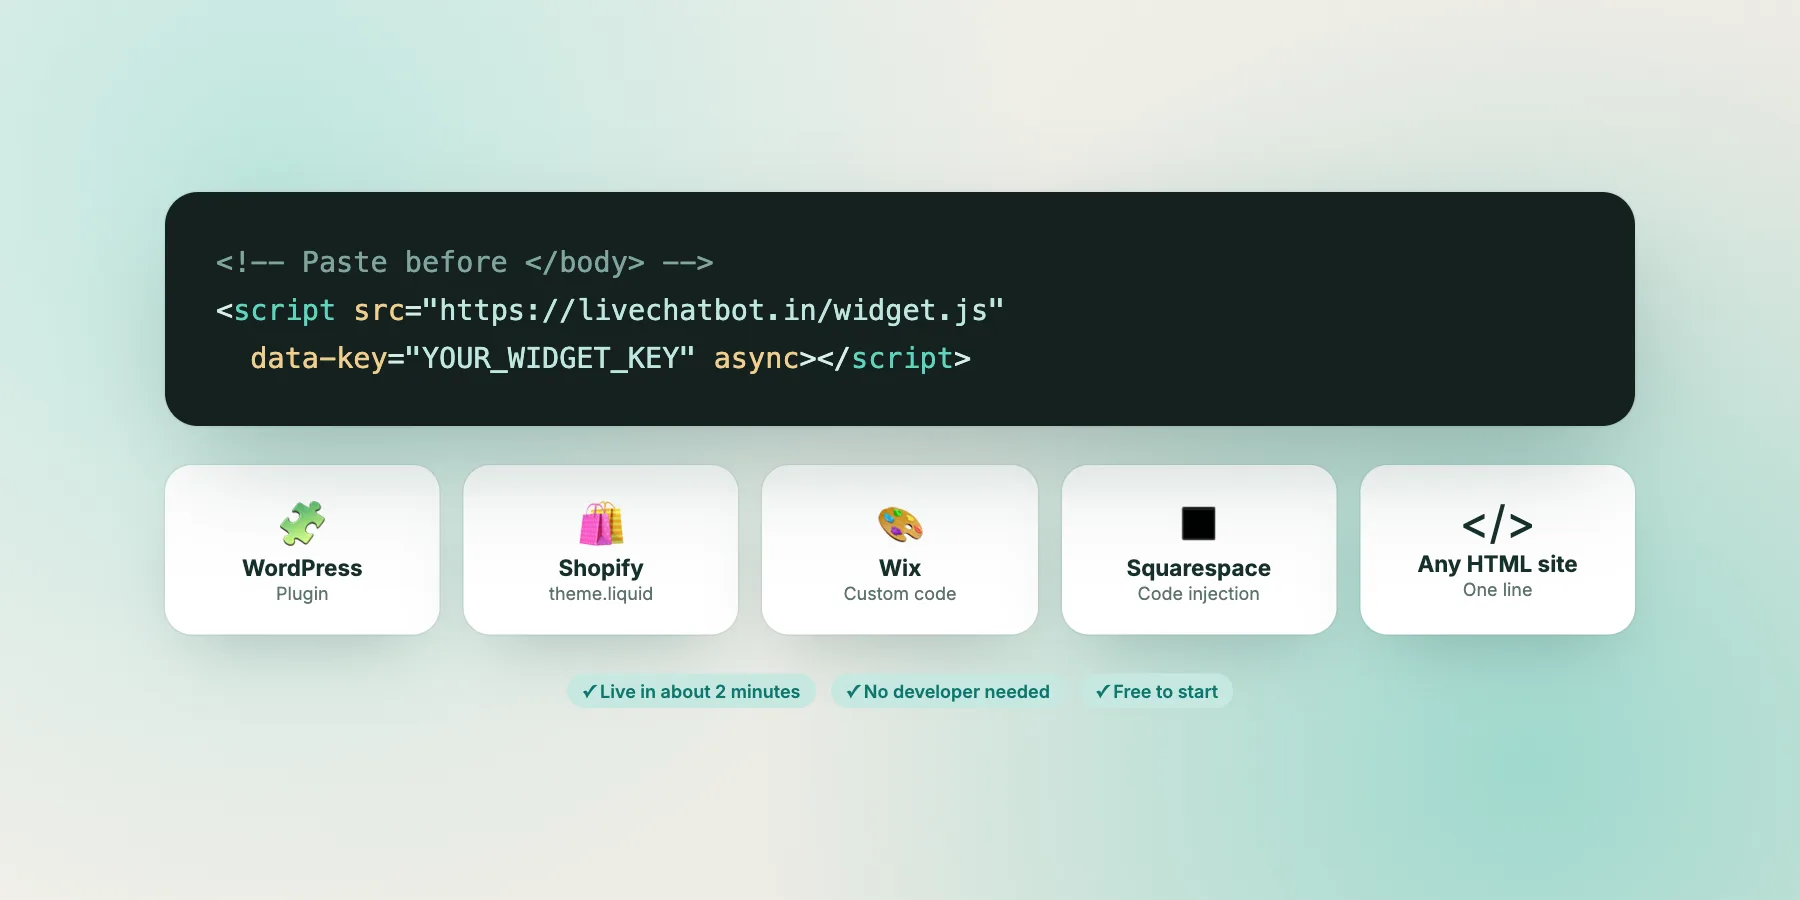
- Every install is the same idea: paste one snippet before the closing body tag, or use a plugin that does it for you.
- WordPress, WooCommerce and Joomla have ready plugins; Shopify, Wix and Squarespace use paste-in code.
- React and Vue sites can use the framework plugins or load the snippet once in the main layout.
- If the bubble doesn’t appear, check caching, a cookie or script blocker, the ‘where it shows’ rules, and that the code is on the live site.
How it works
One snippet, loaded on every page
Before the platform steps, it helps to understand what you are installing. When you sign up, your dashboard gives you a short snippet of JavaScript tied to your website. When a page loads, the snippet fetches the chat window from LiveChatBot’s servers and draws the bubble in the corner. Nothing is installed on your hosting, no database changes, and you never have to touch the code again: colours, words, hours and rules all change from the dashboard.
That means two things for installation. First, the snippet must be on every page where you want chat, which is why it goes into a shared template (the footer, the theme layout or a site-wide code box) rather than on individual pages. Second, it should load near the end of the page, just before the closing body tag, so it never slows down the content visitors came for. Most platforms have a specific box for exactly this kind of code, usually called “footer code”, “custom code” or “code injection”.
If you can’t find the box, or you’re nervous about editing a theme, ask whoever built your site to do it. It is a two-minute job for them, and you can send them the snippet and a link to this page.
Step by step
Install on your platform
Pick your platform. Each tab shows where the code goes.
- Get the LiveChatBot WordPress plugin (your dashboard’s install page links to it) and add it under Plugins → Add New.
- Activate it and connect it to your website as the plugin’s settings screen explains.
- Visit your site in a private window: the bubble should appear bottom-right.
The plugin also works for WooCommerce stores. Details: WordPress live chat plugin and WooCommerce live chat.
- In Shopify admin, open Online Store → Themes, click the three dots on your live theme and choose Edit code.
- Open theme.liquid and paste the snippet just above the closing body tag.
- Save, then open your storefront to check.
There is no Shopify app to install; the paste-in code is all you need. More in Shopify live chat.
- In your Wix dashboard, open Settings → Custom Code (in the Advanced section).
- Add the snippet, choose All pages, and place it in Body – end.
- Publish the site; custom code only runs on the published site, not the editor preview.
Full walkthrough: Wix live chat.
- Open your site’s Code Injection settings.
- Paste the snippet into the Footer box and save.
- Code injection needs a plan that supports it; check your Squarespace plan if the box is locked.
- Install the LiveChatBot Joomla extension through Joomla’s extension installer.
- Enable it and connect it to your website as its settings screen explains.
- Clear Joomla’s cache and reload the front end.
See Joomla live chat.
- Open each page’s HTML, or the shared footer include if your site uses one.
- Paste the snippet just before the closing body tag.
- Upload the changed files to your hosting and reload.
If you have dozens of separate pages without a shared footer, this is a good moment to create one.
More platforms
React, Vue, Blogger and website builders
React and Vue
For single-page apps, use the LiveChatBot React or Vue plugin, or load the snippet once in your root layout (for example in the main HTML file that your app mounts into). Don’t load it inside a component that re-renders on every route change, or you can end up with duplicates. Because single-page apps don’t reload between routes, call the JavaScript API’s pageView method on route changes if you want visitor tracking to record each page.
Blogger
Go to Layout, add a gadget of type HTML/JavaScript in a section that appears on every page (the footer area works well), and paste the snippet. Blogger may strip or rewrite some code in the main template, so the gadget route is safer.
Other website builders
Most builders (including many Indian ones used for local business sites) have a field called “custom code”, “header and footer scripts” or “tracking code”. If the builder offers a choice, pick the footer or “end of body”. If it only offers the header, that works too; the snippet loads asynchronously.
Landing page tools and funnels
Funnel builders usually have per-page or per-funnel script settings. Add the snippet at funnel level so every step gets it, and use “where it shows” in your dashboard to hide the bubble on pages such as payment steps where you don’t want distractions.
Whatever the platform, the integration is the same chat widget for website visitors on every system: one inbox, one set of settings, one bill.
Troubleshooting
The bubble isn’t showing. Now what?
Work down this list in order. Most problems are solved by step three.
1
Check the live site, not a preview
Editors and previews (Wix, Squarespace, page builders) often don’t run custom code. Open the published URL in a private window.
2
Clear every cache
Caching plugins, your host’s cache and a CDN can serve the old page for hours. Purge all of them after installing.
3
Look for blockers
Some ad blockers and strict privacy extensions hide chat windows. Test in a browser with no extensions.
4
Check ‘where it shows’
If you hid the window on certain pages, devices or countries, you may be testing from one of them.
5
Check you used the right key
Each website in your account has its own snippet. Using site A’s code on site B sends chats under the wrong site.
6
Look for duplicates
Two copies of the snippet (plugin plus manual paste) can conflict. Keep one.
Coexisting with other scripts
Cookie banners, WhatsApp plugins and page speed
Your site probably already runs other scripts. A few combinations need attention.
Cookie consent banners
If your cookie banner blocks all scripts until a visitor accepts, the chat bubble won’t appear until they do. Decide with your privacy adviser whether chat is “necessary” for your site or should wait for consent, and configure the banner accordingly. Also check the banner doesn’t physically cover the bubble on phones.
Other floating buttons
A WhatsApp plugin, a “call us” button and a back-to-top arrow often fight for the same corner. Remove what you don’t need: LiveChatBot can show a WhatsApp button card inside the chat window, so you may not need a separate WhatsApp plugin at all. See the WhatsApp chat button guide.
Page speed
The snippet loads asynchronously, after your page content, so it shouldn’t affect how quickly your page appears. If you’re worried, run a speed test before and after installing and compare. The tool PageSpeed Insights is free and shows the impact of each script.
Security plugins and content security policies
Strict security setups sometimes block external scripts. If your developer uses a content security policy, they’ll need to allow LiveChatBot’s script and connection domains. Ask our team for the exact list.
After install
Your first-day checklist
Five minutes of checks avoids a week of missed chats.
Several sites
Installing on more than one website
Agencies, franchise owners and people who run two brands often need chat on several sites. Each website gets its own snippet and its own settings, but they all come into the same team inbox, labelled by site, so one person can answer for several brands without mixing them up.
The free plan covers two websites, each with 100 free visitors per month. Each extra website costs ₹199 for six months. Visitor packs are bought per website (100 for ₹99, 500 for ₹299, 1,000 for ₹499) and never expire, so a quiet site doesn’t waste credit bought for a busy one. See pricing for the full picture.
When installing on several sites, keep a simple table: site, platform, who installed it, date, and which snippet key it uses. It saves a lot of confusion six months later when someone changes theme and the bubble mysteriously disappears.
If you manage client sites, install the snippet in a way that survives theme updates: a plugin, a site-wide code box or a child theme, never a file that the next theme update will overwrite.
Who should install
Doing it yourself or asking your developer
Most owners can install a chat widget for website visitors themselves. If you can log in to your platform’s admin area and paste text into a box, you have every skill required. Still, there are a few situations where it’s worth handing the job to someone else.
Do it yourself when
– Your site runs on WordPress, Wix, Squarespace or Shopify and you already have admin access. – You’ve added other code before, such as a Google Analytics tag or a Facebook pixel. – You can test on the live site straight away and undo the change if something looks wrong.
Ask your developer when
– The site is custom-built and pages are generated from templates you’ve never opened. – You use a strict content security policy, a staging server or a deployment pipeline where changes go through review. – The site is a single-page app built in React or Vue and you want visitor tracking to record each route.
What to send them
Send three things in one message: the snippet from your dashboard, the list of pages where chat should be hidden, and a request to test on a phone after installing. A good developer will be done in a few minutes. If they want technical details beyond that, ask our team for developer documentation.
Whoever installs it, write down where the code lives. Themes change, agencies change and staff change; a single line in your site notes (“chat snippet: theme.liquid, above closing body tag”) saves a lot of searching later.
Then what
From installed to useful
Installing is step one. A chat widget for website visitors only becomes useful when it is set up to answer the questions people actually ask. Over the next week:
- Write your welcome line around the two or three topics visitors ask about most. See how to write a welcome message.
- Add saved replies for your ten most common questions, so you can answer in seconds and the free keyword bot can answer when you’re away.
- Teach the AI Agent your delivery, pricing and policy information so it can answer first. See train your AI chatbot.
- Set up one Flow on your most important page, such as a proactive message on pricing after 30 seconds.
- Install the Android app so chats reach someone when you’re away from the desk.
None of these need code. The snippet you installed today stays the same while everything else improves.
Frequently asked questions
Will a chat widget for website use slow my pages down?
The snippet loads asynchronously after your content, so pages should appear just as fast. Run a before-and-after speed test if you want to confirm.
Is there a Shopify app?
No. On Shopify you paste the snippet into theme.liquid. It takes a couple of minutes and works on all themes.
Do I need to reinstall when I change settings?
No. Install once; colours, words, hours and rules change from the dashboard.
Why can’t I see the bubble in the Wix or Squarespace editor?
Editors usually don’t run custom code. Check the published site in a private window.
Can I install on a site I’m building for a client?
Yes. Add the website to your account, install its snippet, and invite the client to the team inbox. There are no per-seat charges.
Keep reading
Related guides
Chat Widget Settings, One by One: What Every Option Does and the Value to Pick
Get your snippet and install it today
Sign up free on livechatbot.in, copy your code, and paste it into your platform using the steps above.