Chatbot API for Website Owners, Followed Through One Enquiry: Which Door Does What, From Page Load to Solved Ticket (Free Enquiry Timeline)
Chatbot API for website use sounds like one thing, but it is really three separate doors: one that runs inside the page, one that pushes events out to you, and one your server calls with a secret key. Most explanations list the doors in a table. This guide does something different: it follows a single customer enquiry from the first page load to a solved ticket and shows which door is used at each step, so you can see what to build and what to skip.
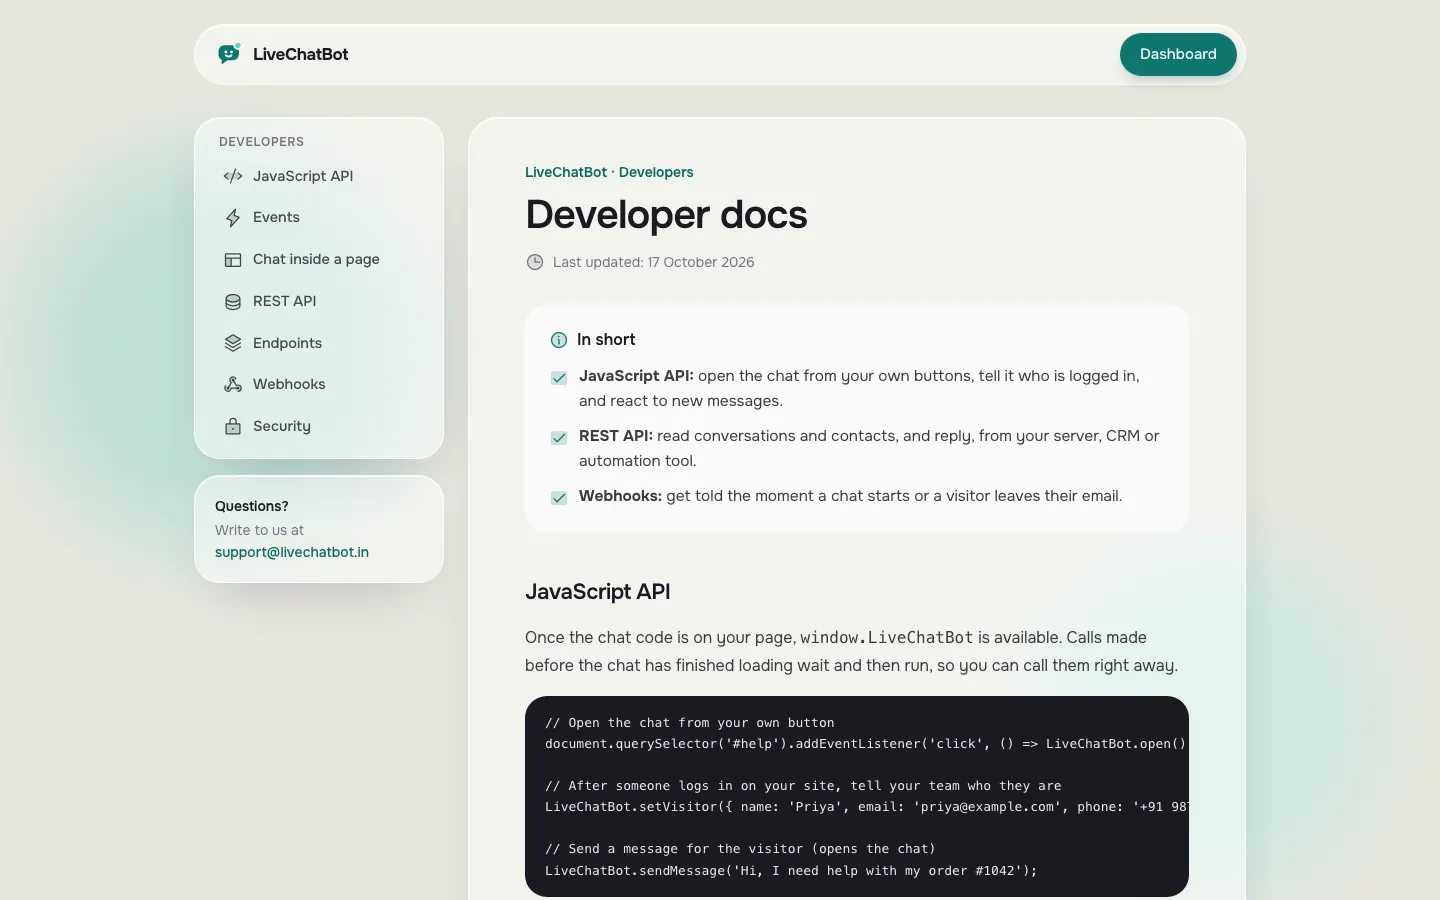
LiveChatBot gives a website three APIs. The JavaScript API, window.LiveChatBot, runs in the page and controls the chat. Webhooks send ticket.created and ticket.solved to your address. The REST API (version 1) lets your server read and create tickets with a secret Bearer key. Most small sites only need the first.
⚡ In short
- The page door is the JavaScript API, window.LiveChatBot. It runs in the visitor’s browser and controls the chat.
- The push door is webhooks: LiveChatBot calls your address on ticket.created and ticket.solved.
- The server door is the REST API (version 1) with a Bearer-token key. The key stays on your server.
- Most small sites need only the first door, plus Zapier for the second. Build the third one only when a real job needs it.
Real screens
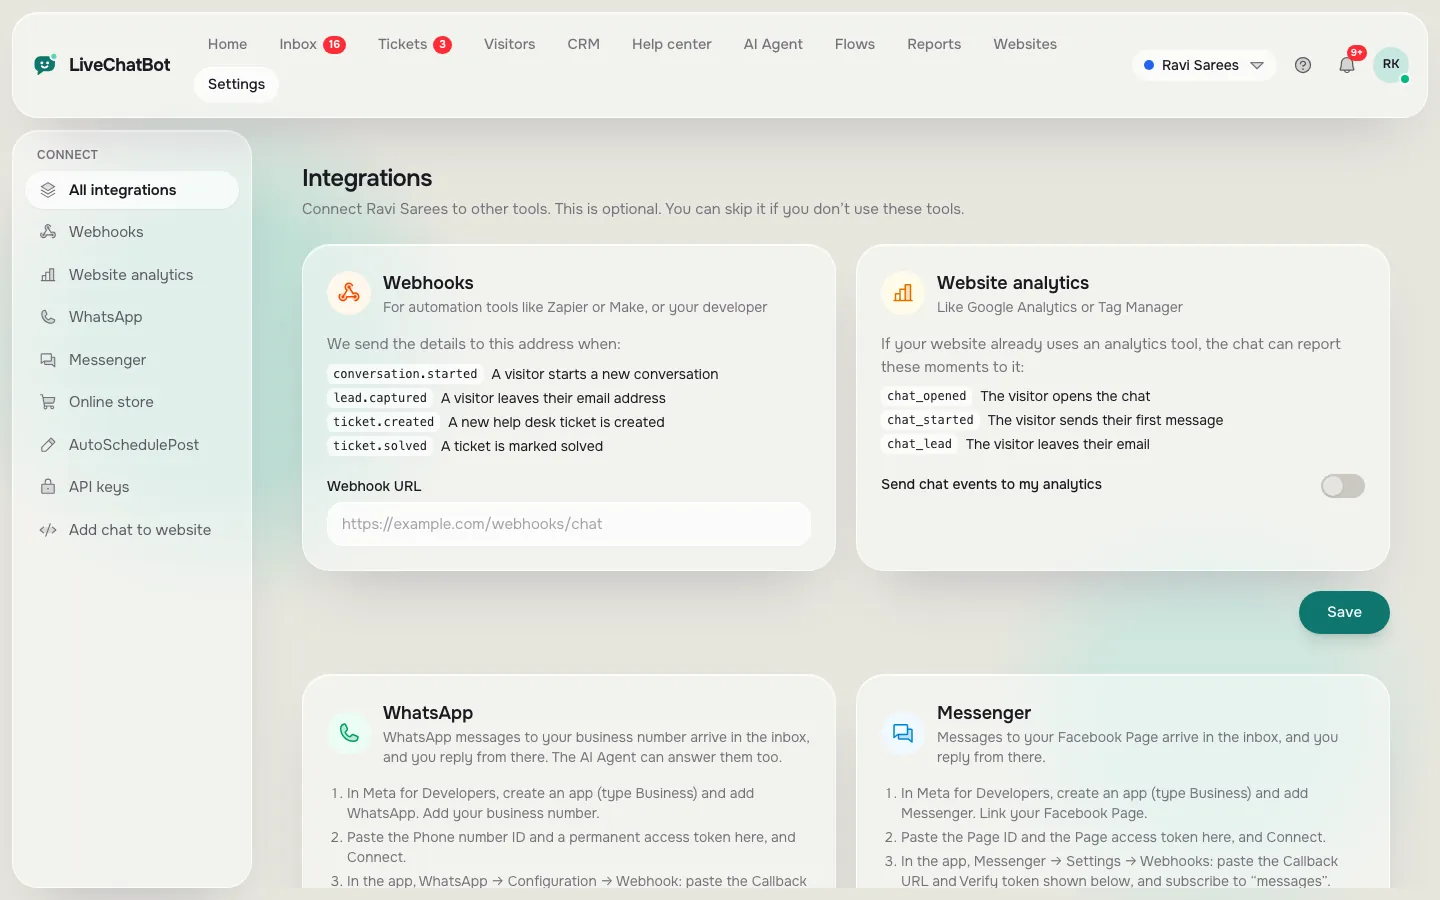
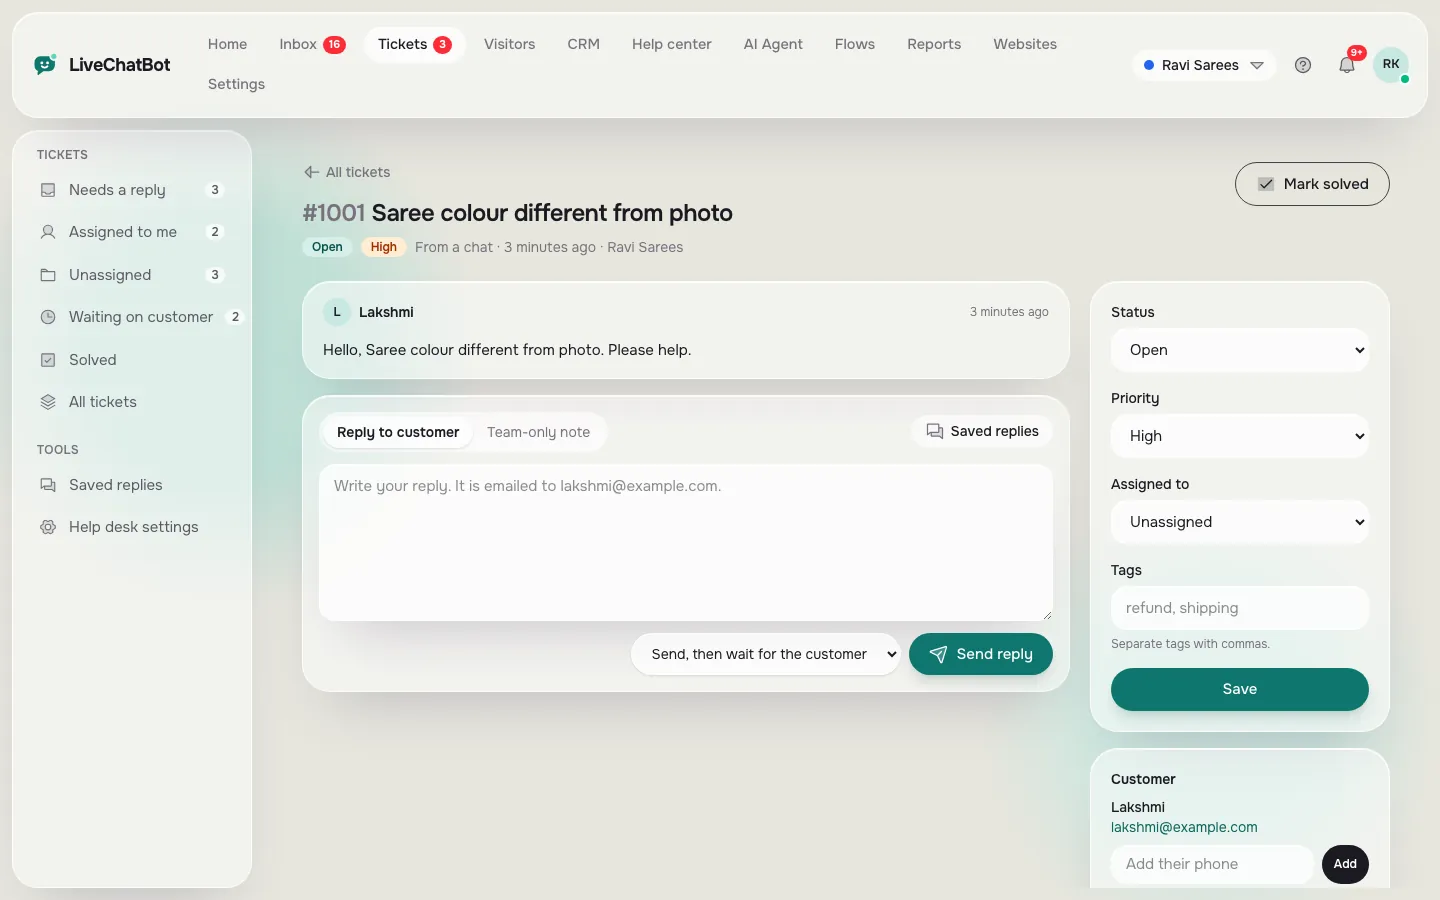
Where the API sits in the product: keys, integrations and the ticket it all revolves around
Real screens from the LiveChatBot panel, shown with sample data. Click any picture to see it full size.
The map
Three doors into one chat tool
There are three doors into the chat tool: the page, the push and the server. Picture the chat tool as a building. A visitor walks in through the front, which is your widget. Behind the scenes there are three doors for your own code.
Door 1: the page door
This is the JavaScript API, `window.LiveChatBot`. It runs in the browser. You can open or close the chat, show or hide it, tell it who the visitor is with `setVisitor`, send a message, report a page view and listen for events. No server and no secret key are involved, which also means you must never put anything secret there.
Door 2: the push door
Webhooks work the other way round. Something happens inside LiveChatBot, and it calls an address you choose. Today there are two events: `ticket.created` and `ticket.solved`. Zapier can catch them without code.
Door 3: the server door
The REST API (version 1) lets your server read conversations and tickets and create tickets. Your code proves who it is with a Bearer-token key made under Integrations, then API keys.
Plain widget basics come first in our website chat widget guide. Copy-ready page snippets are in live chat API integration. Call `setVisitor` only after a real login, and never put a secret in page code.
Free tool
Follow one enquiry through the doors
Read down the timeline. Each step names the door, what you send or receive, and whether most small businesses need it.
You paste one script, or use the WordPress plugin. Nothing to code. Optional: `LiveChatBot.pageView()` tells the chat about a route change on a single-page app.
After a real login, call `LiveChatBot.setVisitor({name, email})`. The visitor appears in contacts and your team stops asking for an email.
A button that calls `LiveChatBot.open()` is nicer than a second contact page. Pair it with `show()` and `hide()` to control when the bubble is visible.
Answers come from your knowledge and saved replies. No code needed; this is configuration, not integration.
An away form or a chat turned into a ticket fires `ticket.created`. Point it at Zapier and a row lands in your sheet.
A contact form on your server calls the REST API to open a ticket, or your dashboard reads open tickets. This is the only step that needs a secret key.
`ticket.solved` tells your order system the issue is closed, so nobody chases it twice.
Reading the timeline
What the timeline tells you about a chatbot API for website projects
Most real projects need the page door and Zapier, not a server. Look at the steps again. Four of seven are the page door or no code at all. Two are the push door. Only one needs your server.
That ratio is typical. The real need is usually one of these:
- Open the chat from my own button (page door).
- Recognise logged-in customers (page door).
- Get notified somewhere when a ticket arrives (push door, through Zapier).
- Put chat enquiries beside orders in my own system (server door).
Nobody needs an API to make the bot answer. Answers come from the knowledge you give the AI Agent.
Push door
Webhooks first, code later
Webhooks are the simplest way to hear when something happens, so start there. If your first thought is “I want to know when something happens”, start with the push door and Zapier before you hire a developer.
A ticket webhook starts a Zap. The Zap can add a spreadsheet row, send an email to your accounts person or post to a tool your team already reads. That covers most alerts without a server. Our guide to connecting live chat to Zapier walks through it.
Know the limits. There are two events today, so a webhook will not report every chat message. Send a test ticket after every change, because a Zap that fails quietly is worse than none.
Original data
Worked example: how many API calls a small shop really makes
Rate limits sound scary until you do the maths once. This is an illustrative example with made-up traffic, so swap in your own numbers. The limits are real: 120 requests a minute per API key on the REST API, and 240 requests a minute per IP on the widget API.
Say your order screen lists open tickets and refreshes every 15 seconds, and 3 people keep it open.
- One screen refreshing every 15 seconds = 60 / 15 = 4 requests a minute.
- Three screens = 3 x 4 = 12 requests a minute.
- That uses 12 / 120 = 10% of one key’s allowance.
- A nightly job that reads 500 tickets, one request each, would hit the cap in 500 / 120 = about 4.2 minutes if you fire them all at once. Spread them out, or ask for lists instead of single records.
Other numbers from the product
Version 1 of the REST API is the one that exists today. Ticket webhooks have two events. A login attempt in the app is limited to 10 a minute. None of these limits is a setting you can change.
What most guides miss
Our rule: if you need to hear about it, make it a ticket
Webhooks only fire for tickets, so a chat that never becomes a ticket never calls your address. Most guides list that as a limit. We treat it as a design tool.
Decide what counts as “needs a human follow-up” before you build anything, and make exactly that event create a ticket. A chat the bot answered fully stays quiet. An after-hours message that comes in through the away form becomes a ticket and fires the webhook. A chat your agent turns into a ticket fires it too.
Test the rule in five minutes
Send yourself one away-form message and one chat converted to a ticket. Confirm that each produced a row in your Zap. If a case you care about produced nothing, change the case so it creates a ticket instead of asking for a new event.
This keeps your automation small. One question decides what reaches your sheet or inbox: did it become a ticket?
Server door
When the REST API earns its place
Use the REST API only when a job really needs code on your own server.
Jobs that fit
- Your own contact form creates a help desk ticket.
- An internal screen shows open tickets next to orders.
Rules before you start
Keep the key on your server only. Make one key per purpose and revoke it when a script or freelancer leaves. Test with a dummy ticket first. Our guide to keeping your key off the page explains the server proxy pattern, and chatbot with REST API gives five jobs and a quiz.
There is a rate limit to plan around: 120 requests a minute per API key.
Choosing
A quick way to pick your chatbot API for website needs
Pick your door by asking three questions in order and stopping at the first yes. Here are the questions.
- Want chat to behave differently on my site? Page door.
- Want to hear when a ticket is created or solved? Push door, with Zapier.
- Need to create or read tickets from my own systems? Server door.
If you answer yes to none, you do not need an API yet. Install the widget, load your knowledge and come back when a real job appears. For a longer, vendor-neutral checklist, the website chatbot with API questions help you judge any provider before you build on it. Widget first, page door next, Zapier third, REST API last. Our integrations overview lists what exists today, and pricing shows what the free plan covers.
Honest gaps
What the doors do not do
The doors do not give you your own AI model, native app integrations or a way to remove branding. Be clear on the limits, so you don’t build on a wrong assumption.
- You cannot pick the AI model or plug in your own API key.
- There are no native Slack, Teams, Telegram, HubSpot, Salesforce or Calendly integrations; Zapier and webhooks can bridge some.
- “Powered by LiveChatBot” stays on all plans, even with the API.
Start your plan from what exists. The website chat widget overview covers the visitor side.
Frequently asked questions
What is a chatbot API for website use?
It is a way for your own code to talk to the chat tool. With LiveChatBot there are three: a JavaScript API in the page, ticket webhooks and a REST API for servers.
Do I need a developer to use a chatbot API for website projects?
Not for the page door if you can paste a small snippet, and not for webhooks if you use Zapier. A developer helps for the REST API.
Where do I get a LiveChatBot API key?
Under Integrations, then API keys, in the dashboard. Keep it on your server and revoke it when it is no longer needed.
Are there rate limits?
Yes. The REST API allows 120 requests a minute per API key, and the widget API is limited to 240 requests a minute per IP. These are fixed.
Can I use my own AI model through the API?
No. The AI provider is set by LiveChatBot, and you cannot choose the model or bring your own key. You teach the AI Agent through its knowledge.
Keep reading
Related guides
Chatbot and Live Chat Together: Write a Hand-Off Map That Says Which Questions the Bot Keeps and Which Go to a Person
Start with the door you need
Free plan for two websites, no per-seat charges. Sign up at livechatbot.in and try the page door in ten minutes.