Chatbot Integration With Website, Layer by Layer: Show It, Teach It From Your Pages, Then Connect Forms, Store and Handoff (Free Integration Ladder)
Chatbot integration with website sounds like one job, but it is really three: putting the chat on your pages, teaching it what your pages say, and connecting it to the things that happen around the chat. Do them in that order and each layer is small and testable. Skip ahead and you end up debugging a store link before the widget even loads. This guide walks the layers one at a time and ends with a tickable ladder you can follow.
Chatbot integration with website means three steps in order: show the chat with one code snippet or plugin, teach the AI Agent from your own pages and files, then connect forms, store, team and tools. Test each step before starting the next.
⚡ In short
- Layer one is display: one snippet, or the WordPress plugin, puts the chat on your pages.
- Layer two is knowledge: type answers, copy a page or upload a file.
- Layer three is connections: forms, your store, tickets, Zapier, webhooks and the API.
- Finish and test each layer before starting the next. Most problems come from doing them together.
The big picture
What chatbot integration with website really means
People use the phrase for very different things. A shop owner means “get the bubble on my site”. A developer means “send chat events to my own system”. A marketer means “make sure leads from forms and chats end up in one place”.
All three are fair, and they sit on a ladder. The bottom rung is purely visual. The middle rung decides whether answers are right. The top rung decides whether the chat does anything useful once a visitor has left.
If you only need the chat to appear and answer, stop after layer two. Many small sites do. Our website chat widget guide covers the look-and-feel side in more depth, so here we keep to how the pieces connect.
Where does the time go? In the LiveChatBot dashboard, layer one is about two screens and one paste, layer two is the part that takes an afternoon, and layer three is a switch or short form per connection.
Layer one
Show the chat: the snippet, the plugin and where it goes
One snippet
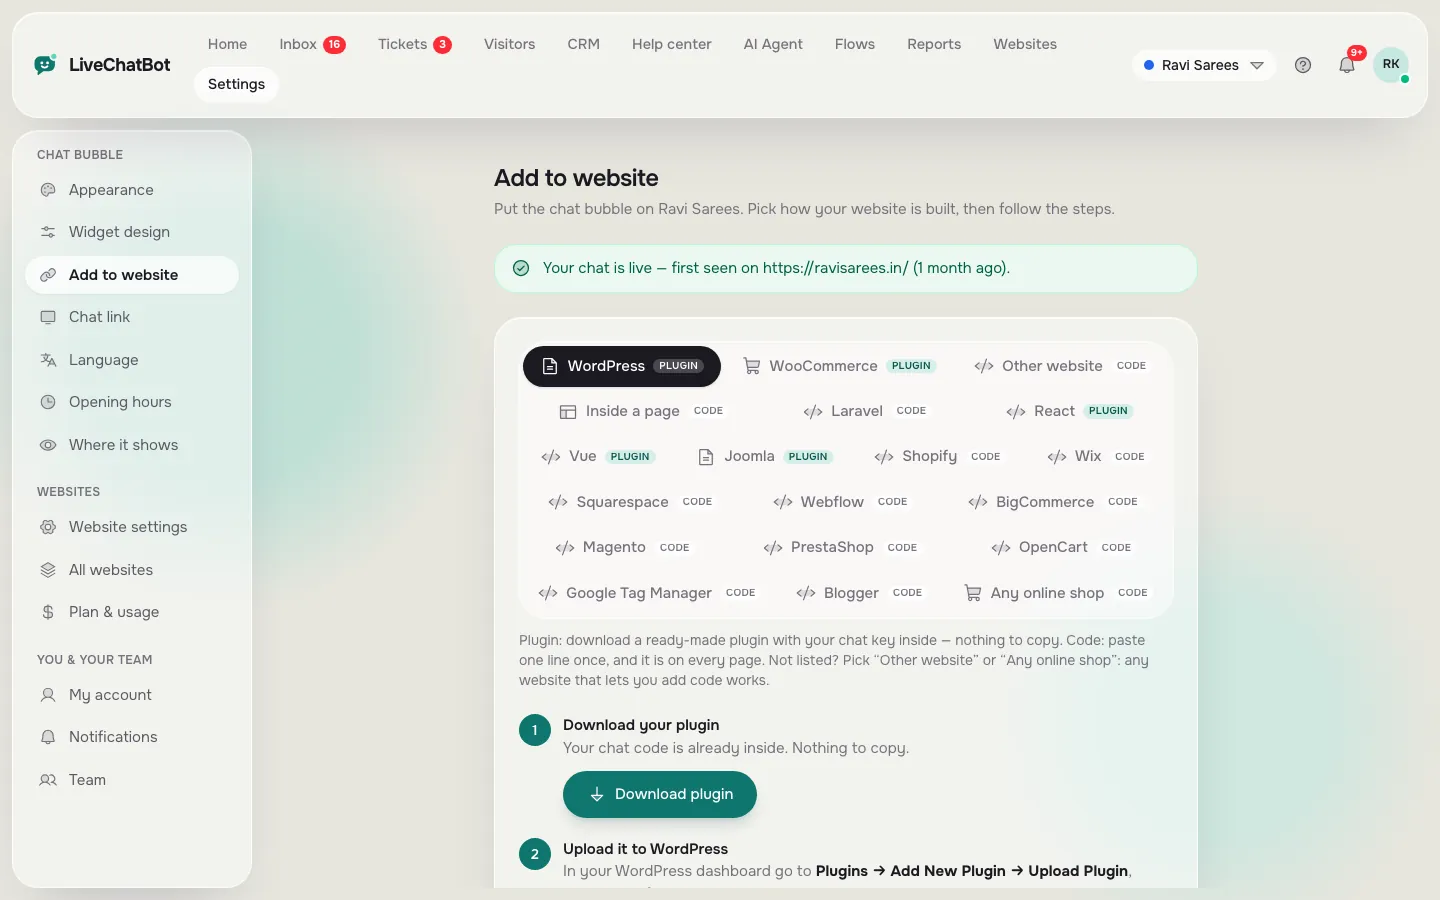
Add your website in the dashboard and you get one short code snippet. Paste it before the closing body tag of your pages, or into the custom code area your builder gives you. WordPress owners can use the plugin instead and skip the pasting.
- It loads on every page you want, not only the home page. Open a product page, a contact page and a blog post.
- It loads once. If your theme and a plugin both add it, you may get two bubbles.
- It looks right on a phone. Open the site on a real handset, not just a narrowed browser window.
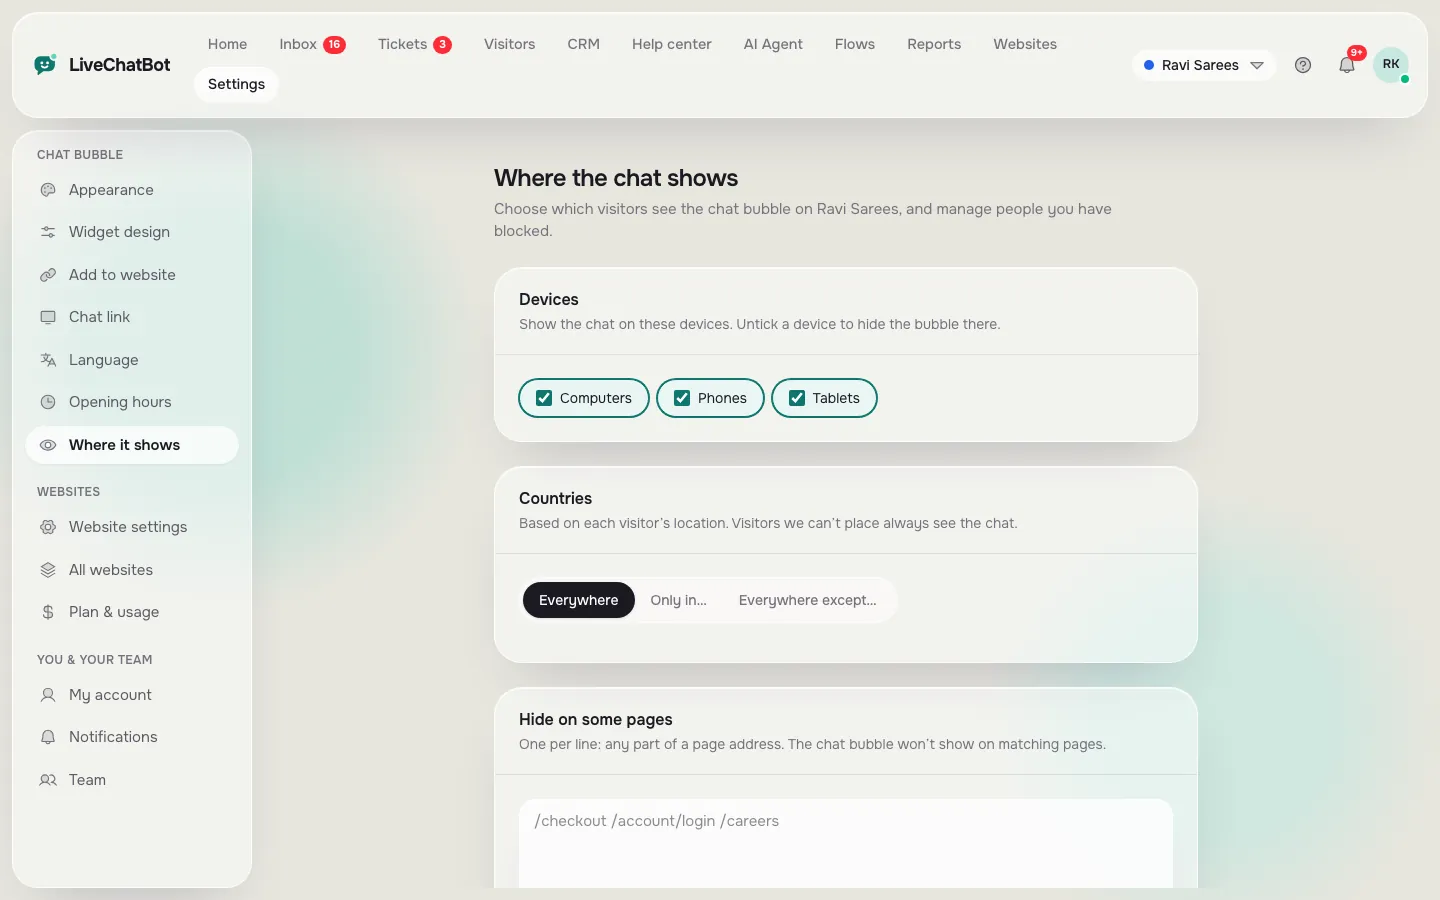
You can then decide where it should and shouldn’t appear. The visibility settings let you show the chat on some pages and hide it on others, and the language setting makes the widget text match your visitors. Do not move on until this layer is boring and reliable.
Real screens
The display layer in the panel
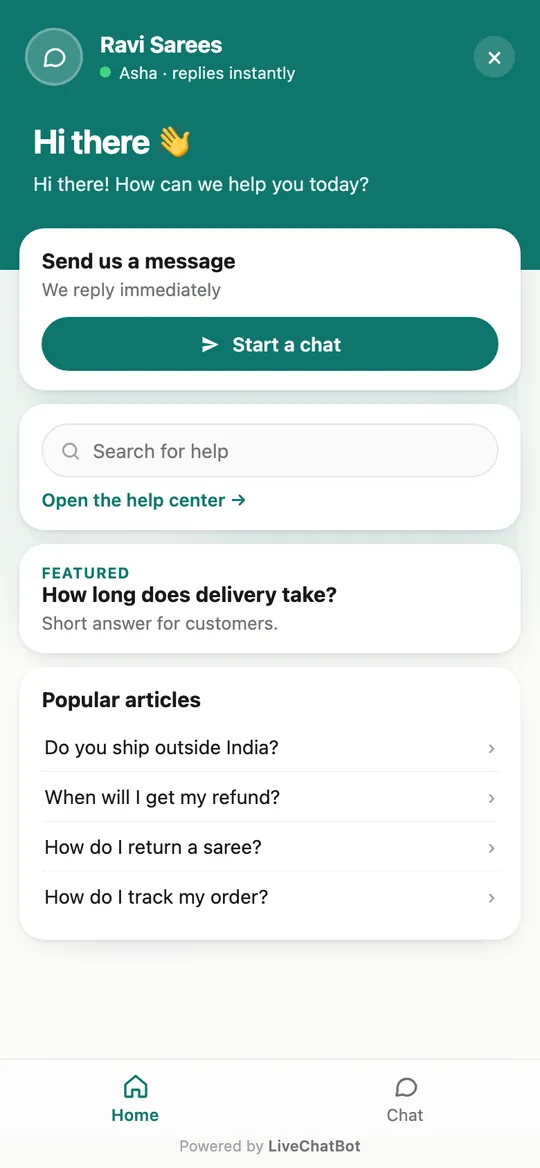
Real screens from the LiveChatBot panel, shown with sample data. Click any picture to see it full size.
Layer two
Teach it your site: knowledge from your own pages
A chat that appears but gives vague answers is worse than no chat. This layer is about feeding the AI Agent real facts.
Three ways in
Type answers directly. Copy a web page so its text becomes knowledge, which suits a shipping page or an FAQ you already wrote. Or upload a file: PDF, Word, Excel, CSV or plain text, such as a price list or a menu.
Keep facts and behaviour apart. Prices, hours and policies belong in Knowledge. How the bot should behave, such as “keep replies short” or “never promise delivery dates”, belongs in the Rules box on the Name and tone page. Rules apply while your website has AI replies.
Test in the playground first, asking what a customer asks, then something you never taught it. The honest answer is “I’m not sure” plus a way to reach you. Read more in the AI Agent guide.
Layer three
Connect forms, store and team without writing code
Now the chat can talk to the rest of your site. Several connections work out of the box.
- Website forms. The widget and the WordPress plugin catch submissions from Contact Form 7, WPForms, Elementor Pro, Gravity, Fluent and Ninja forms. Each becomes a lead with an instant “New lead” alert.
- Your store. WooCommerce and Shopify can be connected so agents see the cart and purchases are detected. For Shopify you connect the store and paste the code; there is no Shopify App Store app.
- Your team. Chats can be routed to teams, assigned to a person, and answered from the Android app.
- Tickets and the help center. A chat nobody could answer can become a ticket, and public articles let visitors find answers first.
Each connection is a switch or a short setup, tested with one dummy submission. For this part of chatbot integration with website work, our chatbot integration service or DIY post helps decide which of these you can do yourself.
Beyond the built-ins
When you need other tools: Zapier, webhooks and the API
Some systems have no direct connection. LiveChatBot does not have native Slack, HubSpot, Salesforce, Zoho, Calendly or Stripe apps, and it does not offer voice or SSO.
What bridges the gap
Zapier can pass new leads into thousands of apps, webhooks fire when a ticket is created or solved, there is a REST API with its own documentation, and a JavaScript API on the page lets your own code open the chat or pass a logged-in visitor’s name.
Use a built-in connection when one exists, Zapier when a non-technical person maintains the link, and webhooks or the API only when someone can read logs. For customer records in particular, see chatbot with CRM integration, and for developers, live chat API integration has the request-level detail.
Free tool
Climb the integration ladder
Tick each rung as you finish and test it. The bar shows how far through a safe integration you are.
Original data
What the numbers look like: LiveChatBot’s own limits, with the maths
A small site can plan its capacity from published plan limits. These figures come from LiveChatBot’s own plan rules as of November 2026, not from a survey.
- Free: 2 websites, 100 visitors per website a month, so 200 visitors in total, but never more than 100 on one site.
- Starter (₹299): 2 websites sharing 750 visitors a month. One busy site can use 600 of them while the other uses 150.
- Growth (₹699): 5 websites sharing 2,500 visitors a month, which is 500 per site if they are evenly busy.
Worked example
A shop gets 320 visitors a month on its main site and 80 on a blog. Free covers the blog but not the shop (320 is over 100). Starter covers both: 320 + 80 = 400, which leaves 350 spare out of 750. That is the point of shared visitors: one busy site does not force you to buy for the quiet one.
Rate limits also shape integrations. Visitor messages are capped at 20 per minute per IP, the widget API at 240 requests a minute per IP, and the REST API at 120 requests a minute per key. A Zapier or script integration that polls every second would hit the REST limit, so poll every minute or use webhooks.
What most guides miss
Our rule: name the job, then tag every test
Most integration guides tell you what can be connected. Few say when to stop. Our rule has two parts.
1. No connection without a named job
Write one sentence before you add a link: “When X happens, Y should land in Z, so that someone does W.” If you cannot finish it, skip the connection. A Zapier step that nobody reads is just another place where visitor details are stored.
2. Tag every test with the same word
Every dummy form, test chat and sample order should contain a marker such as ZZTEST. Five minutes later you can search for it in the inbox, your sheet and your store, and confirm it arrived in each place. Delete the marked records afterwards. This five-minute sweep also shows you which links silently failed, which is the failure most guides never mention, because nothing breaks on screen.
Common problems
Where chatbot integration with website projects go wrong
Doing all layers at once is the classic mistake: if the bubble is missing, the answers are odd and a lead has vanished, you cannot tell which layer failed. Finish one, test, move on.
Caching is the next trap. After pasting the snippet, clear your host’s cache and view the site in a private window.
Last, knowledge ages. A price changes and the bot repeats the old one, so reread the knowledge and chat ratings monthly. Add only the connections you will use, and mention chat in your privacy notice.
Cost
What this costs to run
The free plan covers two websites with 100 visitors per website each month. Starter is ₹299 a month for two websites and 750 visitors shared; Growth is ₹699 a month for five websites and 2,500 visitors shared. Plans are prepaid, with no auto-renew and no per-seat charges, and yearly plans pay for ten months and give twelve.
Check the pricing page for the current plan details, and the integrations page for the list of supported connections. Back at the website chat widget guide you can compare layouts once the plumbing works.
Frequently asked questions
How long does chatbot integration with website take?
The display layer takes minutes. Teaching the bot takes an afternoon if your facts are ready. Connections take as long as each one needs to test, usually minutes for forms and a bit longer for a store.
Do I need a developer?
Not for display, knowledge, forms, store or team setup. A developer helps only when you want custom webhooks or API calls.
Can the chatbot read my existing web pages?
Yes. You can copy a page’s text into the AI Agent knowledge, or upload a PDF, Word, Excel, CSV or text file.
Does it connect to Slack or HubSpot directly?
No native apps exist for those. Zapier, webhooks and the REST API can bridge many tools.
Will adding more connections slow my site?
The chat loads as a small widget, but test your pages after each change, as with any script you add.
Integrate one layer at a time
Free plan for two websites, no per-seat charges. Start free on livechatbot.in and climb the ladder.